
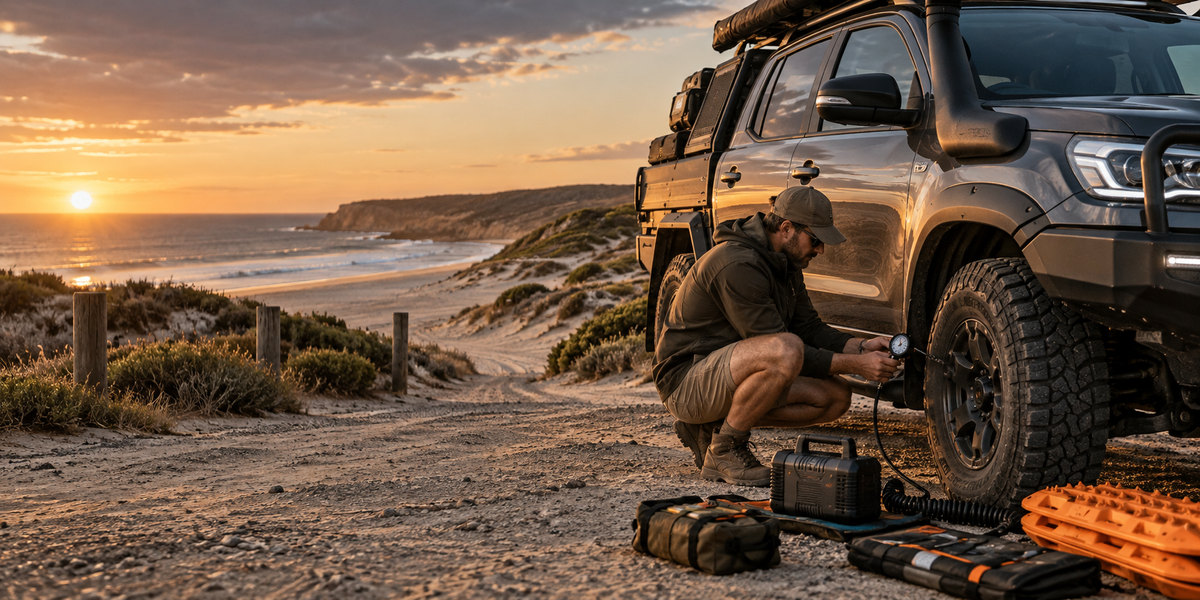
Before You Reach for the Recovery Rope: A Practical 4WD Tyre Pressure Guide
Before reaching for the recovery rope, check your tyre pressures. My practical starting points for sand, corrugations, rocks and mud—and the gear I carry to air down and get home.
Before I attach a recovery rope, I want to know why the vehicle stopped moving.
Sometimes it is properly stuck. Sometimes the track has won. But plenty of sand recoveries begin with a vehicle still sitting at road pressure, the driver feeding it more throttle and four tyres doing a brilliant job of digging their own graves.
Tyre pressure is not the answer to every off-road problem, but it is one of the cheapest and most effective changes you can make. Done properly, airing down gives the tyre a longer footprint, helps it conform to uneven terrain and lets the vehicle work with the surface instead of punching through it.
Done badly, low pressure can create its own problems: heat, damaged sidewalls, dented wheels, lost beads and vague handling.
So this is not a list of magic numbers. It is how I think about pressure, where I would start and what I would change before reaching for the recovery gear.
THE SHORT ANSWER
| Terrain | Practical starting range | What I am watching |
|---|---|---|
| Sealed road | Vehicle placard pressure, adjusted for load as the manufacturer specifies | Cold pressure, payload, heat, wear and handling |
| Rough gravel | About 28–32 PSI for many touring 4WDs | Load, speed, sharp rocks and tyre temperature |
| Corrugations | About 24–30 PSI | Speed, heat, steering response and sidewall movement |
| Rocky tracks | About 18–24 PSI | Rim strikes, sidewall pinch, sharp edges and bead security |
| Mud | About 18–24 PSI | Wheelspin, steering, hidden holes and whether the tread can clear |
| Firm beach sand | About 18–20 PSI | How hard the vehicle is working and whether it is beginning to dig |
| Soft or churned sand | About 14–18 PSI | Sidewall flex, steering inputs, speed and bead security |
These are conservative starting points for many conventional touring 4WDs—not instructions for every tyre, vehicle or load. A heavy wagon, loaded dual-cab, light Jimny, stiff LT tyre and passenger-construction tyre can all behave differently at the same PSI.
My rule is simple: start sensibly, look at how the tyre and vehicle respond, adjust in small steps and slow down as the pressure comes down.
THERE IS NO MAGIC PSI
People love a single answer. “Just run 18.” “Drop them to 15.” “I do every track at 22.”
That advice might work perfectly for the vehicle it came from. It tells me very little about yours.
The right working pressure changes with:
- actual loaded vehicle weight;
- front-to-rear weight distribution;
- tyre size and construction;
- sidewall stiffness;
- wheel size and tyre profile;
- the surface underneath you;
- speed and distance;
- ambient temperature;
- and whether you are towing.
A 3.5-tonne touring wagon on LT tyres does not have the same requirements as an empty short-wheelbase 4WD. Even the same vehicle can need a different answer once you add a canopy, drawers, fridge, long-range tank, passengers and a camper behind it.
The numbers in this guide are where I would begin the conversation, not where I would end it.
WHAT AIRING DOWN ACTUALLY CHANGES
Reducing pressure allows the tyre casing to flex and the contact patch to lengthen. That spreads the load over more ground and lets the tyre roll over soft or irregular terrain rather than cutting into it as aggressively.
On sand, that extra flotation is the main event. On rocks, the flexible tyre can conform around the surface and find grip. On corrugations, a sensible reduction can take some harshness out of the impacts instead of transmitting every hit straight into the tyre, suspension and vehicle.
But pressure is still supporting the vehicle. Keep removing air and the casing flexes more, heat builds more quickly, steering becomes less precise and the risk of the tyre unseating or the wheel striking an obstacle rises.
Airing down buys traction and flotation by spending speed, heat capacity and sidewall support.
That trade is worthwhile off-road. You just have to respect it.
SAND: PRESSURE BEFORE MOMENTUM
Sand is where tyre pressure makes the most obvious difference.
At road pressure, a firm tyre concentrates the vehicle’s weight into a shorter footprint and tends to push down through soft sand. The driver feels the vehicle labour, adds throttle, creates wheelspin and starts building a trench.
I would normally begin around 18–20 PSI on firmer beach sand and assess the vehicle. If the sand is dry, churned or soft and the vehicle is still working too hard, I would step down gradually into the 14–18 PSI range.
RACQ publishes 15–18 PSI as a general sand-driving range and 12–15 PSI for soft sand, while Saber suggests 18–20 PSI as a starting point and 14–18 PSI for softer dunes. That difference is exactly why I do not pretend one number suits every vehicle.
Below about 14 PSI, the margin for aggressive steering, speed and side-loading becomes much smaller on a conventional non-beadlock wheel. That territory should be treated as a deliberate low-speed response to genuinely soft conditions—not a normal set-and-forget touring pressure.
WHAT I DO AT THE BEACH ENTRY
- Stop on firm ground where I am not blocking everyone else.
- Check the conditions and tide before driving onto the beach.
- Engage the appropriate 4WD mode before the soft section.
- Air all four tyres down evenly with a proper gauge.
- Drive smoothly and feel how hard the vehicle is working.
- If it starts labouring, stop early and reassess instead of burying it with more throttle.
Momentum matters in sand, but momentum is not the same as speed and wheelspin. The aim is smooth progress with the least resistance—not arriving at every soft patch like you are qualifying for Dakar.
CORRUGATIONS: THE PRESSURE AND SPEED WORK TOGETHER
Dropping pressure on corrugations can improve ride quality and help the tyre absorb smaller impacts, but it does not make speed irrelevant.
A starting range around 24–30 PSI works for many touring setups, depending on the tyre, load and road. A lightly loaded vehicle may be comfortable toward the lower end. A heavily loaded rear axle, sharp stone surface or long high-speed section may require more support.
The trap is dropping pressure and then driving faster because the vehicle feels better. The tyre is now flexing more on every rotation. Add speed, load and hot conditions and temperature can climb quickly.
I keep checking:
- how much the steering response has changed;
- whether the rear feels loose under load;
- tyre temperature during stops;
- sidewall bulge;
- and whether the road has changed from rounded corrugations to sharp rock.
If the vehicle is shaking itself to pieces, pressure is only one part of the answer. Slow down and find the speed at which the vehicle, suspension and tyres are working together.
ROCKS: FLEX HELPS, BUT THE WHEEL STILL NEEDS PROTECTION
On rocky tracks, lower pressure lets the tyre wrap around obstacles instead of skipping across their tops. It can improve grip and make the vehicle feel far more settled.
For many conventional touring 4WDs, I would begin around 18–24 PSI and drive slowly enough to choose a line.
The risk is impact damage. Too little pressure, too much speed or too much load can pinch the tyre between a rock and the wheel, damage the sidewall or strike the rim. Low-profile tyres have less room to absorb that hit, while a stiff LT casing may need a different pressure to produce the flex you expect.
This is where watching the tyre matters more than repeating somebody else’s number.
MUD: MORE WHEELSPIN IS USUALLY NOT THE ANSWER
Mud varies too much for one neat rule. A greasy clay surface is different from deep sloppy mud with a firm base somewhere underneath.
A moderate reduction—often somewhere around 18–24 PSI—can help the tyre conform and find traction. But going extremely low in deep ruts can expose the sidewall and bead to damage, especially when steering under load.
Tread pattern matters here as well. A mud-terrain tyre that can clear itself may behave very differently from a packed-up all-terrain tyre. If the wheels are spinning without the vehicle moving, more throttle usually creates heat, digs the holes deeper and removes whatever chance of a simple drive-out you had left.
Stop early. Look at what the diff housings and chassis are sitting on. Decide whether pressure, digging, boards, a different line or a controlled recovery is the next move.
IF YOU ARE ALREADY BOGGED
The first rule is to stop making it worse.
If the vehicle has lost forward progress and the tyres are digging down, lift off. Every extra rotation can put the chassis closer to the ground and increase the force required to recover it.
MY ORDER OF OPERATIONS
- Stop and assess. Check the vehicle position, tide, traffic, terrain and hazards.
- Confirm pressure. If you are still too high for the surface, lower it in small, measured steps.
- Remove resistance. Dig sand or mud away from the tyres, diffs and chassis.
- Create a path. Use recovery boards correctly and avoid launching them with aggressive wheelspin.
- Attempt a smooth drive-out. Use gentle throttle and the appropriate 4WD settings.
- Move to a planned recovery. If it still will not move, select the correct recovery method and rated equipment.
This does not mean spending an hour digging when the tide is coming in or the vehicle is in immediate danger. Conditions change the priorities. It means recovery begins with thinking—not automatically throwing a rope between two vehicles.
TOWING CHANGES THE EQUATION
A camper or caravan adds mass, rolling resistance and more tyres with their own pressure requirements.
I would not blindly drop the tow vehicle and trailer to the same PSI. The axle loads, tyre sizes, tyre construction and job of each tyre can be completely different. A heavy trailer tyre may still need substantial pressure to carry its load even while the tow vehicle is aired down for flotation.
Before a sand trip with a trailer, I want to know:
- the actual loaded masses and axle loads;
- the tyre manufacturer’s load and pressure information;
- the lowest practical pressure for each part of the combination;
- whether the compressor can reinflate every tyre without overheating;
- and what the exit plan looks like if the combination cannot continue.
Towing into soft terrain is not the time to discover the compressor duty cycle is five minutes and you have six large tyres to fill.
THE PRESSURE KIT I WOULD CARRY
| Item | Why it earns its place | What I would look for |
|---|---|---|
| Accurate gauge | Lets you make repeatable changes rather than guessing. | Clear scale in the useful off-road range and readings I can trust. |
| Tyre deflator | Makes airing down controlled and consistent. | Easy adjustment, robust fittings and a gauge I can read in poor light. |
| 12V compressor | Gets the vehicle safely back to road pressure. | Real airflow, duty cycle, thermal protection, hose reach and suitable power connection. |
| Tyre-repair kit | Can repair some tread-area punctures long enough to get moving. | Quality tools, plugs, lubricant and instructions—not a substitute for proper repair. |
| Valve gear | A damaged core can stop the day over a tiny part. | Spare valve cores, caps and a core tool kept clean. |
| Full-size spare | Sidewall and major tyre damage may not be repairable on the track. | Correct size, usable pressure and accessible mounting. |
When the Saber catalogue lands at Adelaide Expedition Centre, the deflation, compressor, tyre-repair and recovery products will be connected directly into this guide. Until then, I would rather leave the article useful than fill it with links that go nowhere.
AIRING BACK UP IS PART OF THE TRIP
Low off-road pressure and highway speed do not belong together.
Before returning to sealed roads or sustained higher speeds, stop somewhere safe and reinflate to the correct road pressure for the vehicle and load. Do not assume the tyres are “close enough” because the service station is only twenty minutes away.
Also remember that the placard normally specifies a cold pressure. Tyre pressure rises as the tyre heats. Do not bleed a hot road tyre back to the cold placard figure and then act surprised when it is underinflated the next morning.
I also use the airing-up stop to inspect:
- sidewalls and tread for cuts or bulges;
- wheels for damage;
- valves for leaks;
- uneven pressure between tyres;
- and anything underneath the vehicle that the track may have rearranged.
THE MISTAKES I SEE MOST OFTEN
- Waiting until the vehicle is stuck: air down before the soft section.
- Copying somebody else’s number: their vehicle, load and tyres are not necessarily yours.
- Using throttle to compensate for pressure: wheelspin often turns a simple adjustment into a recovery.
- Dropping pressure without dropping speed: flex and heat rise together.
- Sharp steering at very low pressure: an easy way to unseat a bead.
- Forgetting the rear axle load: canopy and touring weight matter.
- Carrying a compressor that cannot do the job: four hot half-inflated tyres are not a completed plan.
- Driving back onto bitumen still aired down: reinflation is not optional.
MY TAKE
The best recovery is the one you avoid.
If a vehicle is struggling in sand, corrugations, rocks or mud, pressure is one of the first things I want to assess. Not because lower is always better, but because the right pressure lets the tyre do the job it was designed to do.
I start conservatively. I watch the tyre. I feel what the vehicle is doing. I adjust in small steps and match the speed to the pressure.
And if it stops moving, I stop digging.
That is the point where I reassess the terrain, remove resistance and decide whether the vehicle can drive out cleanly or whether it is time for a controlled recovery.
Because the recovery rope should be part of the plan—not the first tool grabbed every time the track gets soft.
— Leighton Calvert, Adelaide Expedition Centre
READ PART ONE: RECOVERY GEAR WITHOUT THE GUESSWORK →
Safety note: This Field Note provides general information only. Suitable tyre pressure depends on the vehicle, tyre, wheel, actual load, terrain, temperature and speed. Follow the vehicle and tyre manufacturer’s instructions, remain within legal access conditions and seek practical 4WD training where required. Very low pressures, excessive speed and aggressive steering can cause tyre failure, loss of control or the tyre separating from the wheel.
NEED A HAND CHOOSING THE RIGHT GEAR?
Tell us where you are going, what you drive and how you travel. We will help you narrow it down without the sales pitch.
 FIELD NOTE 1
 FIELD NOTE 2
 FIELD NOTE 3